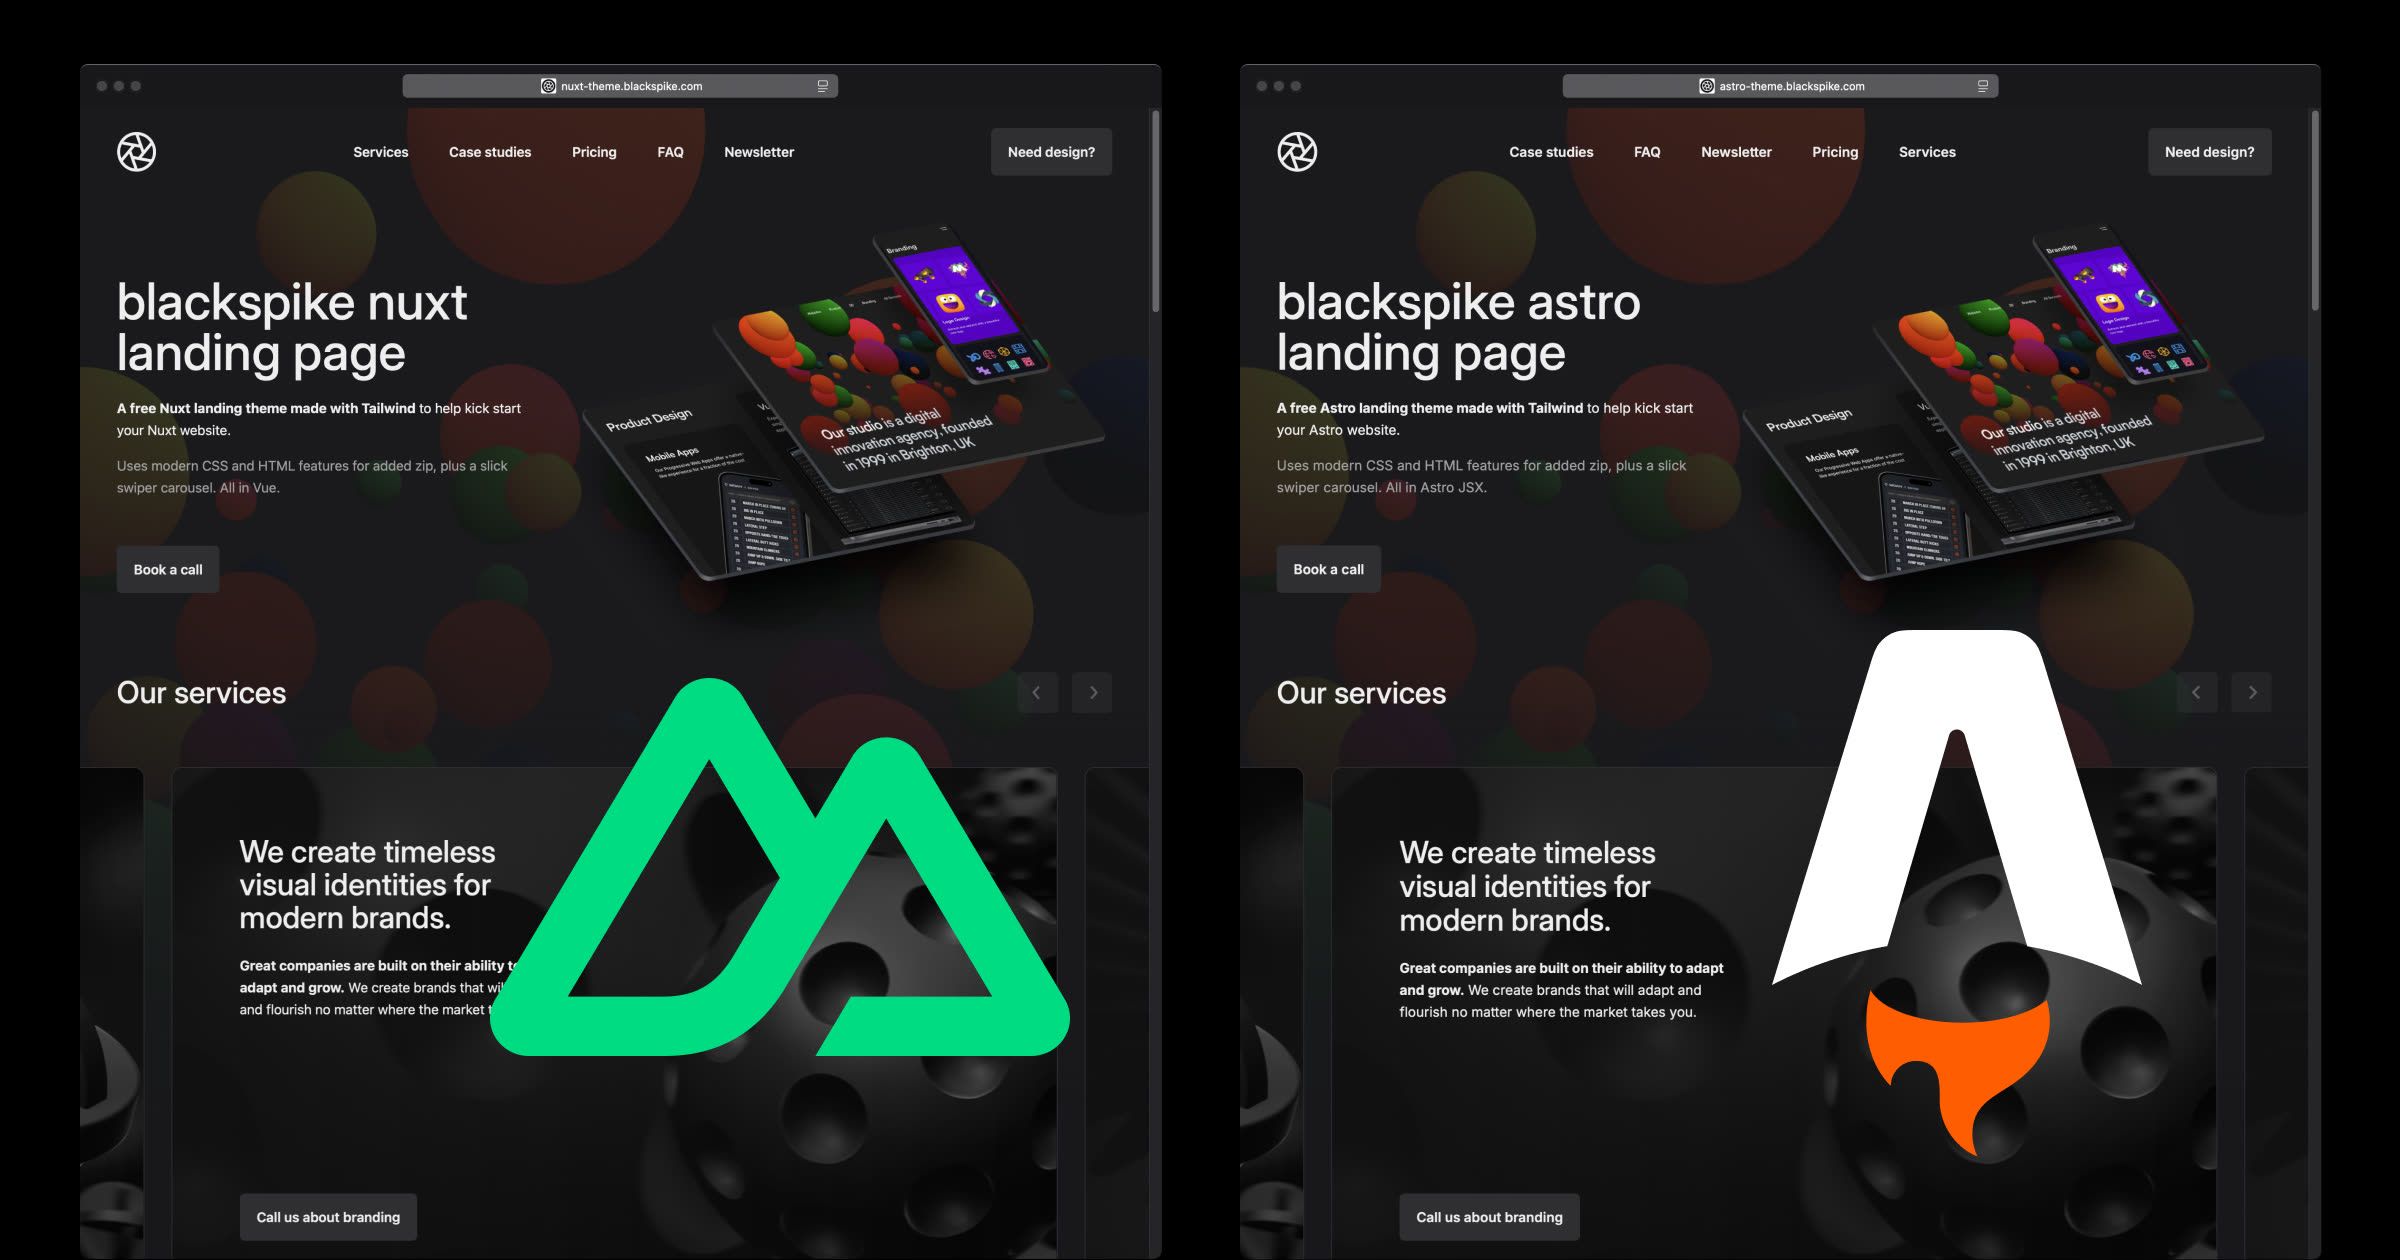
We love Astro and Nuxt and use both extensively. We lean towards Nuxt for any website that needs a bunch of interactivity (for example, the YouTube-like web app we built for the sqlbits.com conference video-on-demand page), and Astro for largely static-content sites, like this one!
We previously wrote about why we initially built this very site in Nuxt before converting it to Astro, and how we built our latest PWA in Nuxt – horses for courses.
With all that said, we thought it would be interesting to convert our free Astro theme to the alpha version of Nuxt 4 to see what’s new.
Hopefully this also gives an insight into Nuxt for Astro developers.
How to install Nuxt 4 alpha
This will prompt you to install create-nuxt@3.25.1 which will install Nuxt 4 alpha:
npm create nuxt@latest
# alpha: npm create nuxt@latest -- -t v4

# add @nuxt/fonts, @nuxt/icon and @nuxt/image modules when promptedUpdate: Nuxt 4 has been released! You can upgrade your old/alpha projects with https://nuxt.com/blog/v4, or, if starting from scratch, npm create nuxt@latest
The new Nuxt 4 directory structure
The most notable Nuxt 4 feature is the new directory structure. Copy the public and src folder from our astro project, renaming src to app.
We can delete app.vue file and the server directory. Now all your front end Nuxt stuff – components, composables, assets, plugins and pages live in the app folder.
Adding Tailwind 4 to Nuxt 4
An easy three step process, firstly, install the new Tailwind CSS & Vite dependencies:
npm i tailwindcss @tailwindcss/vite
Secondly, create a global.css in /app/assets/css. This will be where your custom Tailwind classes go
@import "tailwindcss";

@theme {
  --color-brand: #ff00ff;
}
Finally, open nuxt.config.ts, import tailwindcss, add our global.css file, and include the Tailwind vite plugin:
import tailwindcss from "@tailwindcss/vite"

export default defineNuxtConfig({
  css: [ '~/assets/css/global.css' ],
  vite: {
    plugins: [ tailwindcss() ]
  }
})
And we are good to go!
Converting our Astro components to Vue components
This is the main job of work, we’ll start with a simple example, FAQsection.astro
- Rename .astro to .vue
- Convert the frontmatter to a vue setup script tag
- Change astro props to defineProps
- In Nuxt, components are auto imported, so we can delete the import
- Wrap the html in
<template />tags - Change the
jsxmap tov-for - Change the
jsxtitle conditional tov-if - Convert the astro
set:htmltov-html - Use :colon attribute bindings instead of braces
FAQsection.astro
---
import DetailsAccordion from "./DetailsAccordion.astro"
const { title, faq } = Astro.props
---
<section>
  { title && <h2 set:html={ title } />}
  <div>
    { faq.map( item =>
      <DetailsAccordion
        question={item.question}
        answer={item.answer}
      />
    )}
  </div>
</section>
FAQsection.vue
<script setup>
const props = defineProps(['title', 'faq'])
</script>

<template>
  <section>
    <h2 v-if="title" v-html="title" />
    <div>
      <DetailsAccordion
        v-for="item in faq"
        :question="item.question"
        :answer="item.answer"
      />
    </div>
  </section>
</template>
Then have an argument with someone about which syntax is better (hint: it’s vue, although it would be 🆒 if we could omit the <template/> tags)
Or, get ai to do it
This is exactly the tedious sort of task an ai agent is great at. We can just prompt it to
and go for a pint. We tried out Roo for this, and it worked great
Check its work!!!
Convert the layout and pages to vue
We deleted the app.vue earlier, we could have used it for the layout page but to keep projects as close as possible, we’ll rename the /app/layouts/Layout.astro file to. /app/layouts/default.vue, open up and let’s do some more convertin`…
Astro head vs Nuxt head
First off, we can move all the CSS imports to the nuxt.config.ts where we added the global.css earlier. As we mentioned earlier, Nuxt auto-imports all components, plugins and composables so we can delete all but our custom data, global_settings.json. Oh, and convert Astro.props to vue’s defineProps, and wrap it all up in a script tag.
---
import '../assets/css/global.css'
import "../assets/css/base.css"
import "../assets/css/typography.css"
import "../assets/css/layout.css"
import "../assets/css/buttons.css"
import { Font } from 'astro:assets';
import Image from "astro/components/Image.astro"
import bg_image from "../assets/theme-images/hero-image.jpg"
import global_settings from "../data/global_settings.json"
import DialogModal from "../components/DialogModal.astro"
import FooterMain from "../components/FooterMain.astro"
import HeaderMain from "../components/HeaderMain.astro"
const { title, description } = Astro.props
---
becomes
<script setup>
import global_settings from '../data/global_settings.json'
const props = defineProps([ 'title', 'description' ])
</script>
Astro metadata vs Nuxt metadata
This is an area where the two frameworks approaches diverge; in Nuxt we use the built-in useSeoMeta composable for all the metadata, whereas Astro is much more HTML-like. Let’s convert Astro to Nuxt
<html lang="en">
  <head>
    <meta charset="utf-8" />
    <meta name="viewport" content="width=device-width" />
    <title>{ title ?? global_settings.title }</title>
    <link rel="icon" type="image/svg+xml" href="/favicon.svg" />
    <link rel="manifest" href="/manifest.json" />
    <meta name="description" content={ description ?? global_settings.description } />
    <meta name="theme-color" content={ global_settings.theme_color } />
    <meta property="og:title" content={ title ?? global_settings.title } />
    <meta property="og:description" content={ description ?? global_settings.description } />
    <meta
      property="og:image"
      content={ global_settings.base_url + global_settings.social_image }
    />
    <Font cssVariable="--font-inter" preload />
    <Font cssVariable="--font-inter-display" preload />
  </head>
  <body id="top">
becomes
<script setup>
import global_settings from '../data/global_settings.json'
const props = defineProps(['title', 'description'])

useSeoMeta({
  title: props.title ?? global_settings.title,
  ogTitle: props.title ?? global_settings.title,
  description: props.description ?? global_settings.description,
  ogDescription: props.description ?? global_settings.description,
  ogImage: global_settings.base_url + global_settings.social_image,
  twitterCard: 'summary_large_image',
  themeColor: global_settings.theme_color,
})
</script>
While this works for the seo metadata, we have to move the lang, favicon and manifest over to nuxt.config.ts.
This is a bit confusing – we can put metadata in useMeta(), useSeoMeta(), useHead() and nuxt.config.ts, we think useSeoMeta is the correct choice
¯\(ツ)/¯
Also Nuxt magically adds the <html>, <head>, <body>, viewport: width=device-width, initial-scale=1 and charset: utf-8 code for you, in case you were wondering where all that was coming from.
export default defineNuxtConfig({
  app: {
    head: {
      title: 'blackspike nuxt landing page', // default fallback title
      htmlAttrs: { lang: 'en' },
      link: [
        { rel: 'icon', type: 'image/svg+xml', href: '/favicon.svg' },
        { rel: 'manifest', href: '/manifest.json' }
      ],
    }
  },
})
Interestingly, both frameworks use an identical slot for content, meaning all the pages are hosted in the same bit:
<!-- Main slot -->
<main id="main">
  <slot />
</main>
Again, we have to change the jsx props to vue props, ie <HeaderMain settings={ global_settings } /> to <HeaderMain :settings="global_settings" />
You’ll notice the <Image/> tag in the code, that’s Astro’s custom Image component for optimised images, we’ll fix that shortly…
Pages
The pages will follow the same routine, delete the unneeded imports, change the bindings, and we can change Astro’s <Layout> tag to vue’s <template>. Our index.astro’s import-festival…
---
import Layout from "../layouts/Layout.astro"
import CaseStudiesSection from "../components/CaseStudiesSection.astro"
import ClientsSection from "../components/ClientsSection.astro"
import FaqSection from "../components/FaqSection.astro"
import ServicesCarousel from "../components/ServicesCarousel.astro"
import HeroSection from "../components/HeroSection.astro"
import NewsletterSection from "../components/NewsletterSection.astro"
import PricingSection from "../components/PricingSection.astro"
import QuoteSection from "../components/QuoteSection.astro"
import TestimonialsSection from "../components/TestimonialsSection.astro"
import caseStudies from "../data/case_studies.json"
import clients from "../data/clients.json"
import faq from "../data/faq.json"
import services from "../data/services.json"
import home from "../data/home.json"
import pricing from "../data/pricing.json"
import global_settings from "../data/global_settings.json"
import newsletter from "../data/newsletter.json"
import testimonials from "../data/testimonials.json"
---

<Layout title={ global_settings.title }>

  <HeroSection
    content={ home.hero_content }
    settings={ global_settings }
    title={ home.hero_title }
  />

  ...
becomes
<script setup>
import caseStudies from '../data/case_studies.json'
import clients from '../data/clients.json'
import faq from '../data/faq.json'
import services from '../data/services.json'
import home from '../data/home.json'
import pricing from '../data/pricing.json'
import global_settings from '../data/global_settings.json'
import newsletter from '../data/newsletter.json'
import testimonials from '../data/testimonials.json'
</script>

<template>

  <HeroSection
    :content="home.hero_content"
    :settings="global_settings"
    :title="home.hero_title"
  />
  ...
Astro Image vs NuxtImg
Both frameworks offer an image optimiser component, Astro’s <Image/> is built in whereas you’ll remember we chose the official Nuxt Images module when we initialised the project.
They work largely the same, you pass an image path to the src and Astro/Nuxt detects and uses the host (e.g. vercel or netlify or cloudflare) and auto-optimises into a modern webp/avif format. You can also BYO image provider like cloudinary.
Astro:
<Image
  src={ bg_image }
  alt=""
  format="avif"
  height={1080}
  width={1920}
  class="absolute min-h-svh object-cover inset-0 bottom-auto -z-1 w-full h-auto opacity-20 mask-b-from-50%"
  loading="eager" />
Nuxt:
<NuxtImg
  src="/hero-image.jpg"
  alt=""
  format="avif"
  :height="1080"
  :width="1920"
  class="absolute min-h-svh object-cover inset-0 bottom-auto -z-1 w-full h-auto opacity-20 mask-b-from-50%"
  loading="eager" />
Note that Nuxt prefers to serve images from /public whereas Astro prefers your images to live in /src/assets. Plus you need to import the Astro component and the image file in the frontmatter.
Importing svg’s
A newish feature of Astro is the ability to import svg files as components.
For example in HeaderMain.astro we have to import the svg and drop it in
---
import Logo from '../assets/theme-images/logo.svg'
---
<!-- Logo -->
<a class="flex xl:min-w-32 group" href="/" aria-label={ settings.title + ' - Home' }>
  <Logo class="group-hover:-rotate-180 group-hover:scale-80 transition-transform ease-bs-spring duration-1000" height="48" width="48" />
With Nuxt, that functionality is provided by an official module, @nuxt/icon, that we also installed with @nuxt/image during init.
There are few ways of configuring it, we could use any of the 200,000 icons from all of the iconify sets. As we only use a handful of icons, we’ll save them locally and import them like Astro.
We’ll download some icons from icones.js.org (kebabed/lowercased works best) to /app/assets/icons/ directory, and back in nuxt.config.ts we’ll configure as follows
export default defineNuxtConfig({
  icon: {
    customCollections: [
      {
        prefix: 'bs-icon',
        dir: './app/assets/icons'
      },
    ],
  },
})
Allowing us to simply use <Icon name="bs-icon:logo" />, or <Icon name="bs-icon:arrow" /> in any of our vue files – again, no importing required.
Finally fonts
The last of the vue/astro module comparison is fonts, again, relatively recent astro api addition, and an additional official @nuxt/fonts module.
In Nuxt, we move the fonts to /public/fonts return to our old friend nuxt.config.ts and choose the weights – Nuxt will magically discover the font files and make them available as easily as: --font-body: Inter; --font-display: InterDisplay.
export default defineNuxtConfig({
  fonts: {
    defaults: {  weights: [400, 500, 600, 700] }
  }
})
You can also use a cdn like google fonts on bunny fonts, but we prefer having them locally.
Fixing the dialog with a composable
Our astro dialog was opened with a plain JavaScript function in a script tag. In Nuxt/Vue, we can add a tiny auto-imported composable that we can share across all components called /app/composables/useDialogOpen.js, a one-liner:
export default () => document.querySelector('#demo').showModal()Now, any button anywhere can trigger the dialog by adding <button @click="useDialogOpen">. Tidier or complicateder? We like it but ymmv.
Final bits
We need to set ssr: true in the nuxt.config.ts to enable server-side rendering as this will be a static site.
In <MainFooter /> we need to replace the standard <a> link to a <nuxt-link to="/credits">about</nuxt-link> and we’re done.
See the final nuxt.config.ts on GitHub
Final thoughts
It wasn’t trivial to switch between frameworks, but not hard either thanks to the surprisingly similar conventions. It would have been much easier had we used vue components in our Astro site.
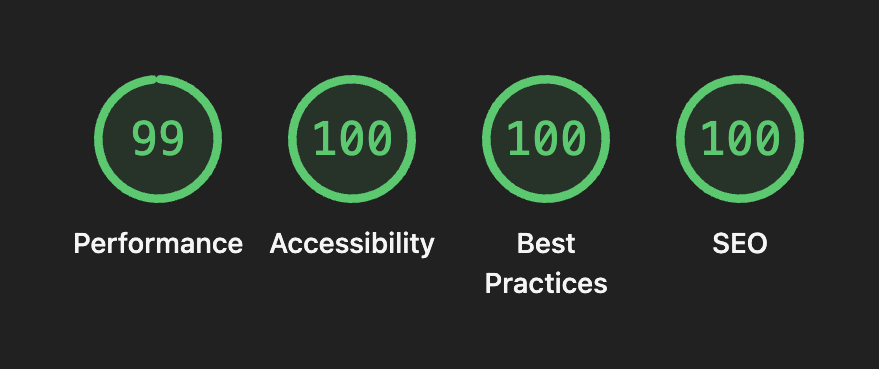
Both our Nuxt and Astro versions have identical (almost perfect) scores in Lighthouse:
While we love the auto-importing of fonts/composables/components etc in Nuxt, we’re not super happy to be shipping 312KB of JavaScript to the browser compared to Astro’s 69KB (nice, all of which is the swiper.js carousel code).
With that gripe aside, overall Nuxt DX, modules, vibes and architecture are fantastic, a dream to develop with.
In conclusion, we’ll continue to stick to Astro for content driven sites, but we’ll absolutely use Nuxt for any web app.
In fact, we already did:
We vibe-coded a Nuxt 4 PWA. A concerned webdev agency’s initial reactions